Note: this post was previously posted on my beauty blog here.
I'm always looking for a nice brush holder but never seem to find something I will completely like so I decided to make my own brush holder. Since I'm into DIY stuff, I already have all the tools I needed for this, but if you don't have I don't recommend buying it just for this one purpose. If you'll use it more than once - that's okay, but if not, it's just worth it. :)
I'm always looking for a nice brush holder but never seem to find something I will completely like so I decided to make my own brush holder. Since I'm into DIY stuff, I already have all the tools I needed for this, but if you don't have I don't recommend buying it just for this one purpose. If you'll use it more than once - that's okay, but if not, it's just worth it. :)
And now, let's check how to do this! Before that, an excuse for these bad pictures, but since I was doing it while it was already night time, I couldn't take better pictures, sorry. :/
You'll need:
(stuff that's crossed you won't bee needing, I changed my mind after I took the picture, lol, so that's just some extra tool :D )
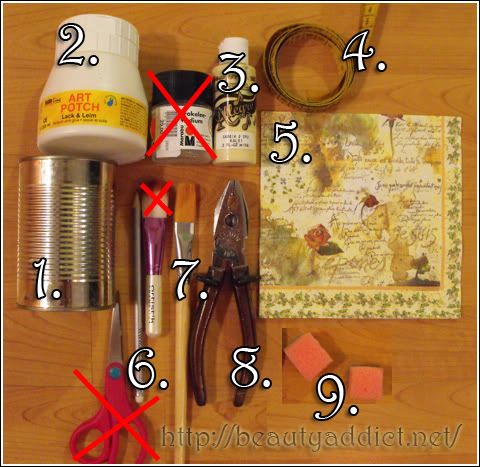
(1) empty can (mine had 400 g of tomato sauce in it)
(2) decoupage glue (you can get it in smaller sizes as well)
(3) acrylic color in Ivory
(4) something to measure the can (height and radius)
(5) a napkin you like
(6) pencil
(7) a brush for decoupage glue
(8) pliers
(9) a piece of sponge (there are to pieces on my photo but that's because I thought I'd use 2 colors, but decided not to this time)
(10) a higher glass with water (for the brush when you're done using it)
Here's how the brush holder looks like after all the work:
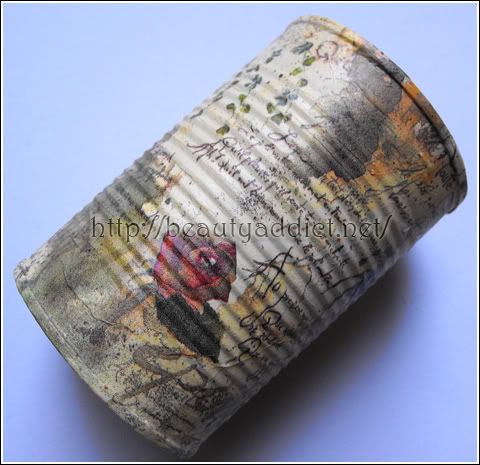 (natural light)
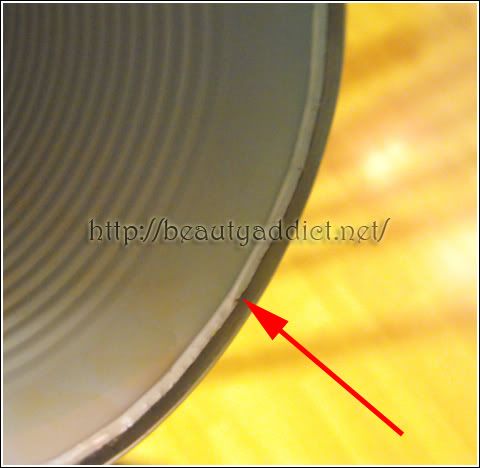
1. Before starting anything, wash thoroughly the can, dry it very well. When it's dry, you have to press the sharp edge on top, on the inner side of the can, which remains there after you remove the lid. Here is how it's supposed to look after you've pressed it:
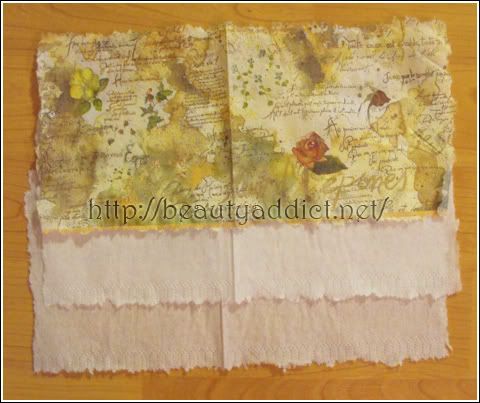
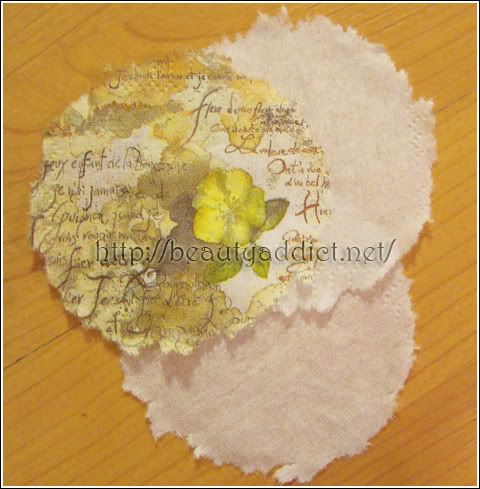
2. Measure your can - bottom, radius, height - draw it on the inner side of the napkin because that's what you'll use to cover the can. My can is 11 cm high, 23,5 cm is its volume and 7 cm is diameter of the bottom. Add at least extra 1 cm at the measures of the height and radius so the edges don't stay visible. The bottom napkin can be smaller for 0,5 cm. And now, start tearing your napkin with fingers (DO NOT use scissors because the edges of the napkin would be more visible). After you're done with tearing, you have to separate all layers and the only one you'll need is the top layer of the napkin. My napkin has 3 layers, so be careful because some of them have 4 layers. Here is how it looks:
3. Now we're starting to paint the can. Use your sponge, add some color and - paint the color by patting it on! Depending on the surface you're coloring, you'll need at least 2 layers of color, but sometimes even 3 layers. I painted my can with 2 thicker layers. Use a smaller brush to get to those edges you can't paint with the sponge. Let it dry.
4. When the color dries we'll start applying the napkin! First you'll be applying the bigger part, slowly by covering it with decoupage glue (when completely dry it gets transparent). Start from the middle part of the napkin, press the brush to get all that air out, and slowly move to the edges of the napkin. This will take some time, few minutes, but it's worth it. After the first part is dry, apply the bottom napkin, also starting from the middle and slowly moving toward the edges! Let it dry.
5. Voila! Here is my brush holder! This is how it looks like:
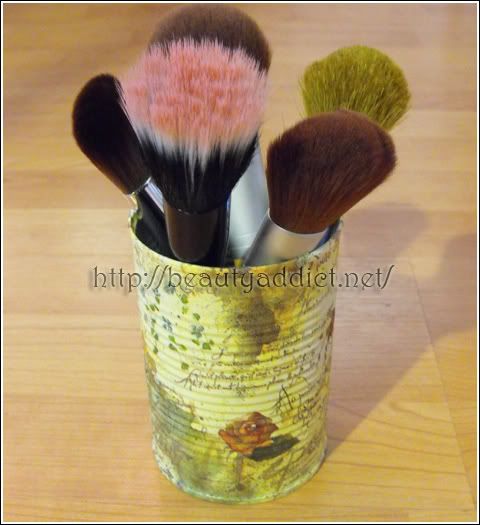 (first picture is more realistic with the color of it!)
So, how do you like this tutorial? Will you be making something like this or rather not :)
the redhead
p.s. if you like, you can put something on the inner side of the can, but I didn't do that, I like it this way. :)
6 comments:
Super izgleda!
V naši družini je sestra tista, ki je pobrala vso umetniško nadarjenost, tako da je zame ni ravno veliko ostalo... :D
Uuu, pa tvoja prva spremljevalka sem :)
Hvala!
Je, je, prvi follower si :D Hvala na tome! <3
A čuj, nismo svi za sve a i bolje tako :D
Odlično si to napravila!
Sviđa mi se tvoj blog.
Nastavljam te pratiti i dalje.
Šaljem ti veliki pozdrav:)
Zondra Art
Hvala! :)
Blog koji definitivno želim i dalje pratiti nakon što sam vidjela ovu fantastičnu limenku, jer i ja radim slične stvari, pozdrav i pusa!
@Sanja - puno hvala na pohvalama! :)
Post a Comment